How do you transform embroidery designs from flat to exceptional?
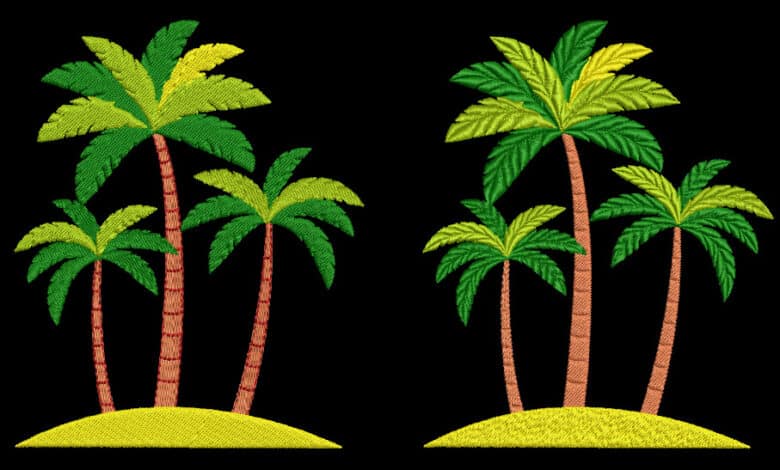
Compare the digitizing techniques used in the two palm tree designs. One uses flat tatami for the leaves and trunk, with a simple run stitch for definition. A nice design.
The other uses a rich, luxurious split satin stitch for the palm leaves and split detail in the tatami trunk, creating a realistic effect that adds depth, dimension, and definition.
Split the difference with Custom Splits
How to add dimensional effects to your embroidery!
Outstanding digitizers aim to create an exciting design with texture and detail while optimizing the design for efficient machine run time. Wilcom’s EmbroideryStudio offers multiple Elements that can automate many complex digitizing processes. One of my favorites is the Custom Split Element.
The Custom Split Element includes various methods to add definition. Use the pre-set template designs or create your own with User Defined Split. Digitizers can decide on the precise needle penetrations required to form and complete the embroidered object adding ‘splits’ in the exact places to build an impressive visual effect.
Tip:
For the best satin stitch results with the User Defined Split feature, digitize split lines approximately perpendicular to the stitch angle.
Run Away Run Stitch
An outline run-stitch is commonly used to define detail in an embroidered shape. However, registration is an important consideration. An alternative is to use a custom split method and avoid the registration issues altogether.
Custom splits can be applied to satin stitch or tatami stitch types. Depending on the base stitch, the effects vary in intensity but always produce a visually interesting result.
Luxurious Satin Stitch
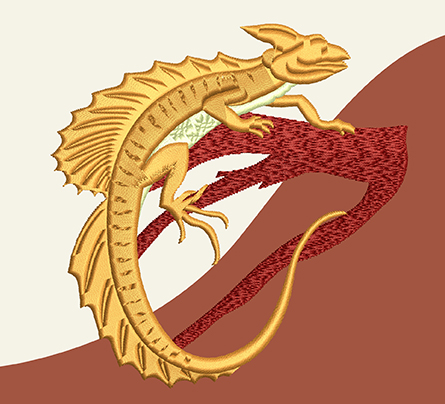
Satin stitch has a more luxurious feel than flat tatami. The downside of the satin stitch is its length restraints. Custom Splits allows you to use these limitations to your advantage by intentionally splitting the satin to help define the shape.
The upside is that you can digitize with satin stitch for that luxurious feel while minimizing stitch count.
Fewer, Faster
A further benefit is creating fewer objects. What could have been an extra object is now a stitch split inside one larger object shape. There is no need to worry about overlapping objects or if the objects will pull apart when embroidered. The result significantly speeds up the digitizing and the production process and results in an exciting design.
User Defined Split is one of the methods in the Custom Split Element. The digitizers address the graphic design as a whole and create the entire embroidery object, including the split lines in one step. Most importantly, the splits remain scalable and editable like all other design objects.
Dull to Exceptional
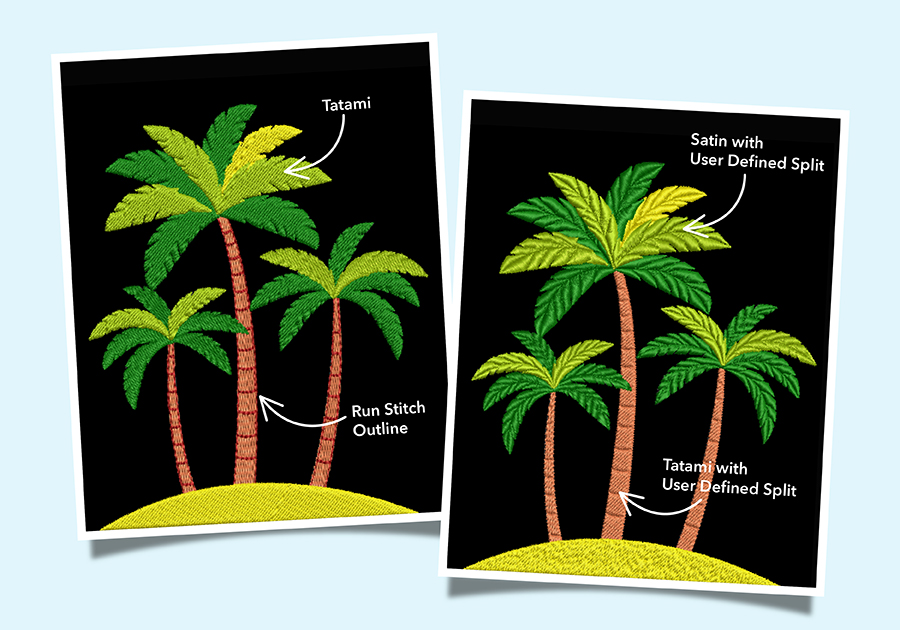
Compare the two palm trees. One uses flat tatami with a run stitch to define the trunk. The other uses a rich, luxurious split satin stitch for the palm leaves and split detail in the tatami trunk.
The luxurious ‘split’ palm tree has depth and dimension. The leaves appear realistic, and the trunk will stitch effortlessly without registration issues.
Create detailed textural designs that are efficient to run in production. Add User-Defined Splits, carving, and other dimensional split effects to your embroidery repertoire!
Add-on Custom Splits Element
Features includes:
Flexi Split, Carving Stamp, Make Lines for Stitch Effects, User Defined Split
